Showing posts with label 2012 Finish. Show all posts

Friday, November 30, 2012

Wintergraphix is Coming! A Christmas Quilt


Can you believe it’s almost December? It feels like only yesterday that I started my Christmas in July efforts, only to be sidetracked by fun in the sun. Now that the days are shorter and the nights are colder, I’ve been able to find more time for sewing. (A road trip across the state and back over Thanksgiving weekend didn’t hurt, either.) Fortunately, I was able to finish this Christmas quilt for my grandma in time for it to be an early Christmas present. My grandma is one of those people who have a knack for transforming their home into a winter wonderland, so I knew she would appreciate this quilt.

 
Most of the fabrics in this quilt are from Wintergraphix I, II and III by Jason Yenter. In the Beginning was my favorite local quilt shop while it was still open, so I have a bit of a soft spot for Jason Yenter’s fabrics. My mom bought most of this fabric for me years ago. I dutifully stored these lovelies in their own plastic bin along with the pattern I picked out for them. When I pulled them out this summer, I realized that the pattern was no longer my style, as it involved lots of sashing and borders. I have grown to thoroughly dislike borders. I couldn’t find another pattern that felt right for these fabrics, so I made up a simple pattern based on 5”x10” and 2.5”x5” rectangles. I miscalculated somewhere along the way, so this quilt ended up closer to twin-sized than lap-sized. For the quilting, I just echoed the seams. I quite like how it turned out. Now I’m itching to make a Christmas quilt of my own.


Monday, November 26, 2012

A Brace of Birthday Bags

Fabric gift bags sure are habit forming! My quest to give gifts in reusable (and preferably handmade) wrapping has spilled over from Christmas gifts to birthday presents. Using the Drawstring Bag Pattern from Jeni of In Color Order as a guide, I made two bags to fit specific items for my sweet girl’s birthday, using fabric* from my stash. Being a toddler, she was much more interested in the toys themselves, so I reused the bags for the next family birthdays only a few days later.


Giving gifts in pretty, reusable fabric bags gives me such nice warm fuzzy feelings that I don’t think I’ll be able to stop anytime soon. I’m already eyeing the scraps from these two bags and planning the next birthday bag.

 
*Fabric used was part of a Happy! by Me and My Sister Designs for Moda jelly roll for the main sections, blue Sketch fabric by Timeless Treasures and purple small chevrons by Riley Blake Designs for the drawstring sections, and an unidentified fabric from Spill the Beans by Barb Tourtillotte for Clothworks.

Monday, November 19, 2012

My First Garment: Wiksten Tank Dress


Making my own clothes has been something that I have wanted to do for years and years. More than once, I bought a pattern and fabric only to abandon the project in frustration or despair. Time passed, and eventually examples of the Tova shirt and Wiksten tank began popping up all over the blogosphere. As I read over and over how easy the pattern was to make and how happy people were with the results, I began to think that I just might be able to make one myself, previous failures notwithstanding.

During the Pacific Northwest Modern Quilt Guild Meet-Up, I received in-person encouragement from Kelli of Drygoods Design. That day, she wore a Wiksten tank that she had recently finished. Paired with a cardigan sweater, it was both cute and professional. Kelli kindly answered my questions about her experience sewing up the tank, and confirmed that quilting cotton was a perfectly acceptable fabric for the tank. Shortly thereafter, I bought the downloadable Wiksten tank pattern and several yards of fabric from a line called AndalucĂ­a. (I'm a sucker for fabric named after foreign locales, especially those I have visited.) I stalled after printing out the pattern though, as I had neither the time nor the inclination to tape together so many sheets of paper and then cut out the pattern. The project languished in a corner until, on a whim, I packed it in my suitcase for Sewing Summit. I wanted to take advantage of the open sewing times, but didn't want to take any of my existing WIPs or something that required a lot of fabric. Packing this project turned out to be an inspired choice.

The Wiksten tank is indeed quite simple, but it took three evenings for this novice to complete the tank dress. It would have taken even longer if not for the moral and practical support of my mom. Along the way, I made a few tweaks to the pattern. I omitted the decorative pocket, make the neckline trim out of contrasting fabric, and used double-fold binding for the armholes (the single-fold option was too fiddly for my tastes). Let me tell you, I am thrilled with the results! In fact, I am sorely tempted to make half a dozen more, and spend this fall and winter exclusively in tank dresses, scarves, sweaters and leggings. Stay tuned for more of this pattern, as I’m planning to go stash diving for another tank dress soon.


 Linking up to Finish It Up Friday at crazy mom quilts.

Tuesday, October 9, 2012

Camera Strap Covers


Sewing Summit is nearly upon us! I am, of course, taking my camera. Since DSLRs tend to look very similar at a glance, I was worried that my camera might get mixed up with someone else’s at such a big event. The solution presented itself via Issue Seventeen of the Mollie Makes magazine: a camera strap cover! The one in the magazine is awesome, but as it seemed rather too complicated for my timeline, I simplified.

Once I measured my camera strap and calculated the necessary seam allowances, it was a breeze to piece a fabric strip of the correct dimensions and turn it into a fun camera strap. I liked how it turned out so much that I made one for my mom, too! In hers, I incorporated one of her personalized labels, which was fun. Since making my camera strap cover, I have used my camera a few times and found that I much prefer the feel of the cover to that of the original strap. I can’t wait to use it more at Sewing Summit later this week!

Friday, October 5, 2012

Flurry Poochie Bag


Ever on the hunt for cute fabric gift bags to make for Christmas, I decided to use up a few more Flurry fat quarters and give Happy Zombie’s Poochie bag a whirl. Despite that fact that I didn’t pay enough attention to the direction of the tree print, I really like the end result. This pattern uses three fat quarters with very little waste, whips up quickly, and is structured enough to stand up on its own. I especially like the traditional gift bag shape. Since the bag is open, I will add some tissue paper when it comes time to wrap a gift in it. Using tissue defeats part of my purpose for making fabric gift bags for Christmas, as I am trying to reduce the environmental impact of our holiday habits. However, this bag is still visually pleasing and handmade, which is awesome. I will definitely make this pattern again, but most likely for one-time occasions such as birthdays, and not for large scale giving holidays.
Linking up with Finish It Up Friday at crazy mom quilts.

Tuesday, August 28, 2012

Wrap It Up Doll Quilt


One of the pitfalls of quilting is that there will always be more inspiration than time to sew. I still like the Scrappy Nine-Patch quilt by crazy mom quilts that I started ages ago. However, I recently came to terms with the fact that I was unlikely to finish my version anytime in the near future. Since discarding all the scrappy nine-patch blocks I had made since August 2010 smacked of failure, I decided to repurpose them.


My sweet daughter is not yet two, and already she has shown a fondness for baby dolls. She particularly likes to cover them with a blanket, or carry them around all bundled up, so I figured one more doll quilt couldn’t hurt. I ditched the sashing and borders and just sewed the blocks directly together. A simple cross-hatch pattern made light work of the machine quilting, and I pieced together coordinating binding scraps for a quick finish. At the end of the day, I was left with a fun doll quilt for my sweet girl and one less project on my Work In Progress list.

Thursday, August 23, 2012

Christmas in July Continued: Flurry Project Bag


At long last, I have found the gift bag pattern that I have been searching for! After making several Everything Bags, and one Snack bag, I found that the Project Bag size of Jeni’s Lined Drawstring Bag Pattern was the perfect size for my purposes: big enough for most presents, cute, quick and easy!  This bag was made from Flurry yardage left over from last year. I anticipate making many more of this size before Christmas rolls around. First step: stock up on Christmas yardage!

For those that are curious about the relative sizes of these bags, here is a picture of the three sizes I have made: Everything, Project and Snack.


Monday, August 20, 2012

Seaside Cabin


Log cabin blocks make me happy. The first quilt I ever made was a log cabin quilt, but I’ve more or less avoided the pattern since then, as there are so many blocks and techniques that I haven’t tried yet. A few weeks ago, I took Katie’s Improvisational Patchwork class, and one of the techniques was making an improv log cabin. We started with a strip pieced center, and then added scrappy logs to the design wall until we were happy with the results. I liked mine so much that I made a mini quilt out of it. (I also used a couple other blocks from the class in the backing.) Finishing at 8” by 12”, it was the perfect size for one of the walls in our house. This mini is named Seaside Cabin because the colors and relaxed piecing technique remind me of vacationing by the sea.


Monday, August 13, 2012

Strawberry Snack Bag


After I finished my Personal Picnic Purse last month, there was quite a bit of fabric left. Usually, I throw smaller-than-a-fat-quarter remnants into my scrap bin, but I liked the strawberry fabric so well that I turned it into a bag. I used Jeni’s Lined Drawstring Pattern (again) in the Snack size, added some polka dot fabric for the lining, and whipped up a little gift bag in no time. I am thrilled with how it turned out, although it’s a little small for a gift bag. Until I need to wrap a small gift, this sweet bag will hang in my sewing nook, spreading a little bit of summer cheer.

Sunday, July 29, 2012

Christmas in July Update: Everything Bags


Have you been wondering about my Christmas in July progress? Well, fear not, I have made some progress and I have even photographed it!


Jeni’s Lined Drawstring Bag has been popping up all over the blogosphere, but I was able to resist its charms until my mom wrapped my birthday present in an Artist Bag. I decided to try out the tutorial before buying the pattern, and started on an Everything Bag, using three fat quarters of Joy by Kate Spain. Before I even finished the first bag, I liked it so well that I bought the full pattern. 


This pattern is absolutely genius! With careful cutting, I was able to make two Everything Bags out of three fat quarters. They came together super quick and easy. I have less time to sew than I would like, but still managed to make four of these bags in less than a week. 


They are so much fun that I already have two more in progress, in different sizes. I love the bags I’ve already made, but they seem a little small for my purposes, so I’ll probably make more bags in the bigger sizes. I can’t wait ‘til Christmas when I can wrap presents in these fun bags!


Tuesday, June 26, 2012

Cheerful Zakka Potholders


Ever since I found Pink Penguin’s blog, I have been intrigued by Zakka sewing. I was thrilled when my mom gave me a copy of the book Zakka Style by Rashida Coleman-Hale just before the start of the Zakka Style Sew Along. As soon as I saw these potholders, I knew that I had to make some for my kitchen. Most of my kitchen accoutrements are blue or orange, but I wasn’t feeling inspired by the orange fabrics in my stash. The yellow Half Moon Modern dots led me to a blue and yellow palette that I find especially cheerful.
Of course, I’m not one to follow a pattern when I can find room to make it my own. Since I didn’t have any linen on hand, I used 100% quilting cottons, which I cut into 1.5” and 2.5” strips. I didn’t see the point of binding the pockets, so I just traced the pattern along the fold of the backing fabrics. After digging through my scraps, I found enough 2” double-fold binding to bind both potholders. This is the first time ever that I bound something curved! Speaking of binding, if you make these potholders, check out the corrected instructions on retro mama’s blog before you start. Incorrect instructions aside, these potholders were quick and easy, which is just what I needed.

Monday, June 25, 2012

Zany Zigzag Baby Quilt


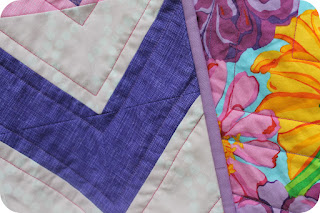
The evolution of a quilt can be interesting at times. This one started when a friend of mine told me she was expecting a little girl. Her colors were purple and pink, and her theme was flowers and butterflies. Since I didn’t have many pink fabrics in my stash, I bought a few half yards and pulled more fabrics from my shelves. The stack sat and sat until I decided on a pattern. I knew I wanted to use half-square triangles, but was stuck until I saw Cluck Cluck Sew’s Scrappy Chevron quilt. Then I had to swap out fabrics until I had an equal number of light pinks and dark purples. Each block is a chevron made from one purple print and one pink print. I made more blocks than necessary so that I could rearrange them until the zigzags turned out how I wanted them to.
Quilting this baby quilt was especially satisfying. I used two colors of thread, pink in the pink zigzags and purple in the purple zigzags and followed the seams. The back is a flowery print that I’ve used for a backing before. The binding is Thistle, a Kona solid. I am quite satisfied with the results and can’t wait to give it to its new owner.

Linking up to Sew Modern Mondays.

Tuesday, June 12, 2012

Baprons, Baby!


Kids sure are messy. It never ceases to amaze me how messy my sweet girl can be when she eats. She can decimate a bib in no time flat, so when I saw the baprons (baby aprons) that Jess at Craftiness is not Optional had made, I knew I had to make some myself. There was no flannel in my stash, so I made a little quilt sandwich and quilted them by machine. If only I had started sooner! The pattern that Jess so generously shared is not quite big enough for my growing girl. These baprons just barely fit right now, but she will most likely outgrow them before she wears them out. I plan to enlarge the pattern, though, because baprons are just too dang cute! (Also, she can’t rip them off like she can rip off traditional bibs.) I love the two I made out of stashed fabrics and binding scraps, even though they aren’t my best work. Baprons are the perfect size to experiment with different quilting techniques and I had fun trying out free motion quilting for the first time. I need to make plenty more baprons before I can move on to free motion quilting on actual quilts. In the mean time, I enjoy gazing across our dining room table at my sweet daughter enjoying her meal while wearing something I made. Eventually I intend to sew actual clothes for her, but in the meantime, I will enjoy the baprons.


A Quilter’s Table

Fresh Poppy Design

Monday, June 11, 2012

Between the Cats Crib Quilt


My first introduction to modern quilting was via FunQuilts, now known as Modern Quilt Studio. I have long admired their patterns. The first one I chose to make was a freebie from their website. Between the Lines is simple, small, and perfect for showcasing favorite prints, such as the ones I hoarded from Benartex’s Paris Cats line.


I finished piecing the top in July 2010, while I was pregnant with my sweet daughter. It sat neglected as my focus shifted to the challenges of pregnancy and then caring for an infant. After I finished the twin-sized Kitty Kaleidoscope for my sweet girl last December, I decided that this quilt would be the perfect crib quilt for her, even though she already has quite a few baby quilts made by family and friends. I machined quilted in the ditch along the purple sashing, and then added some hand quilting to one block in each row for added interest. I finished this quilt in May 2012, close to two years after I started it.


When I presented it to my sweet daughter, she said “Ooooooh!” High prize from a toddler! She then promptly used it to cover one of her dolls. Guess I need to make a matching doll quilt now.


Linking up with Sew Modern Monday, since this pattern is most definitely modern.

UPDATE: Also linking up to Summer Sewing Contest.


Ellison Lane Quilts

Sunday, May 20, 2012

2011 Memory Quilt


The main reason I started blogging was to document my quilting efforts, so that I could remind myself of what I had finished and inspire myself to greater creativity and productivity. I have come to enjoy blogging for its own sake, though, and found that I wanted something tangible to remember my quilts by. I love using leftovers from a finished quilt in a new quilt, but wanted one quilt to represent all the quilts I finished in 2011. The first two quilts I finished last year used the Yellow Brick Road pattern, which resulted in very little “waste.” Most of the scraps were less than 2” wide, so I decided to make postage stamp blocks out of 1.5” squares. The sashing, backing and binding are also made out of scraps. The last block is a big scrap of Lizzy House’s Pearl Bracelet fabric, embroidered with the year and my initials in my own handwriting.


2011 was a challenging year for me. In fact, it was one of the most difficult periods in my relatively short life. Still, I managed to finish nine quilts, thanks to this blog, the online quilting community and my loving and supportive family. I hung this quilt on a wall of my sewing nook and every time I look at it, I think of the people that I made those quilts for: two little babies who are now walking, a dear friend, my husband’s grandma (twice), my grandma, my mother-in-law, my mother and my sweet girl.  Sometimes, I look at this quilt and think of how much I accomplished during a difficult time, and it gives me hope that I will accomplish even more in the future.


Name: 2011 Memory Quilt
Pattern: Postage Stamp blocks
Fabric: Scraps from projects finished in 2011
Started: September 2011
Finished: March 2012
Amy's Creative Side

Monday, May 7, 2012

Scattered Chevron Table Runner

“La inspiraciĂłn existe, pero tiene que encontrarte trabajando.”
Pablo Picasso


One of my favorite artists is Pablo Picasso. Whenever I feel uninspired in my sewing, I remember his advice that inspiration must find you working, and I find it in me to carry on. Most of the time, my quilts are made from someone else’s patterns, or are inspired by someone else’s quilt. Once in a blue moon, I find inspiration in an unlikely place, and the resulting quilt is just that much more satisfying. Even more rewarding is when the quilt is made with someone special in mind. My Scattered Chevron Table Runner is doubly dear to my heart as it was inspired by a piece of wood art and by a person who has inspired me these past few years.


It is no secret that I love Pinterest. For me, it is another way to connect online with people I like, as well as a place to find inspiration and entertainment. A while ago, a colleague pinned this piece of art, and I repinned it as possible inspiration for a future quilt. A short time later, my colleague announced that she was leaving for another company. I have always admired her work ethic, style, and ability to be well-respected in a field dominated by the opposite gender, while still being true to herself as a person and as a woman. I knew that I had to make her something quilted as a farewell gift, as she is a sewist herself. I remembered the art that I had repinned and with very little time at my disposal, pulled a few fabrics from my stash and just started sewing. I began this piece at the first Seattle Modern Quilt Guild sew-in I attended. As I sewed, this small quilt developed deeper meaning.

The front of this piece symbolizes my colleague’s ability to create meaningful insight from black and white data. The back symbolizes her creative and colorful personal style, as well as her vibrant personality. Finally, the binding is symbolic of her strong individuality.

The improv piecing on this quilt was very challenging, but I am very happy with how it turned out. It was difficult to part with this table runner, just as it was difficult to part with my esteemed colleague. However, instead of focusing on what is lost, I choose to focus on what was gained. I am glad I had the opportunity to work on this quilt, and more importantly, I am glad I had the opportunity to work with this fantastic woman.


Linking up with Sew Modern Monday, as this is the most modern quilt that I have made to date.

Tuesday, March 20, 2012

Blueberry Muffin

Name: Blueberry Muffin
Pattern: Improv
Fabrics: Scraps from Blueberry Pie
Dimensions: 18” by 18”
Started: February 2012
Finished: March 2012
Favorite Blueberry Muffin Recipe: Page 53 of The Cupcake Café Cookbook by Ann Warren & Joan Lilly.


Scrap Attack Quilt-Along