Tuesday, April 29, 2014

Vintage Modern Marmalade Baby Quilt

Have you ever gone through a period of time where you want to sew, but nothing you are currently working on excites you? That was me around late-February, early-March this year. I was also feeling like my stash was getting a little stale, so I decided to make a little room by using up two charm packs that I had been holding onto for years: Vintage Modern and Marmalade, both by Bonnie & Camille. Honestly, they coordinate so well, it was like one fabric line was an extension of the other, with is kinda fun.


I wanted something quick and simple that involved controlled scrappiness. Inspired by the scrap therapyquilts of teaginny and Emily Cier’s book Scrap Republic, I cut 72 charms in half, then sorted them into color groups. At this point, a design wall would have come in very handy. Initially, I mixed the low volume prints with the neutral prints, but when I sewed together the columns, it just looked all wrong. As a rule, I am loathe to break out the seam ripper, but in this case, it was warranted. I like the end result so much better after I tore it apart and reassembled it with all the low volume prints in the right color group.


Going along with the stash busting theme, I used a coordinating stripe from one of the lines for the binding, and my favorite Pearl Bracelets for the backing. This quilt is roughly 36” by 36” and I only had a yard of the backing. In the end, it worked out, but I  definitely learned why it’s a good idea to allow a few extra inches of backing all around. (The sides of the quilt are just a little skinnier than originally planned, due to some necessary but regrettable trimming.)


For the quilting, I reinforced the horizontal lines of the quilt by quilting ½” from each horizontal seam with my walking foot. I used Aurifil thread #2000, which is slightly off-white. Thanks to the luxury of a sewing day with my mom, I was able to complete the quilting the same day I started!


I finished this quilt at the most recent Seattle Modern Quilt Guild sew-in. Between the stimulating company and the glow of a finish, I feel creatively revitalized, like a garden in springtime.


Friday, April 25, 2014

Cattitude Wiksten Tank

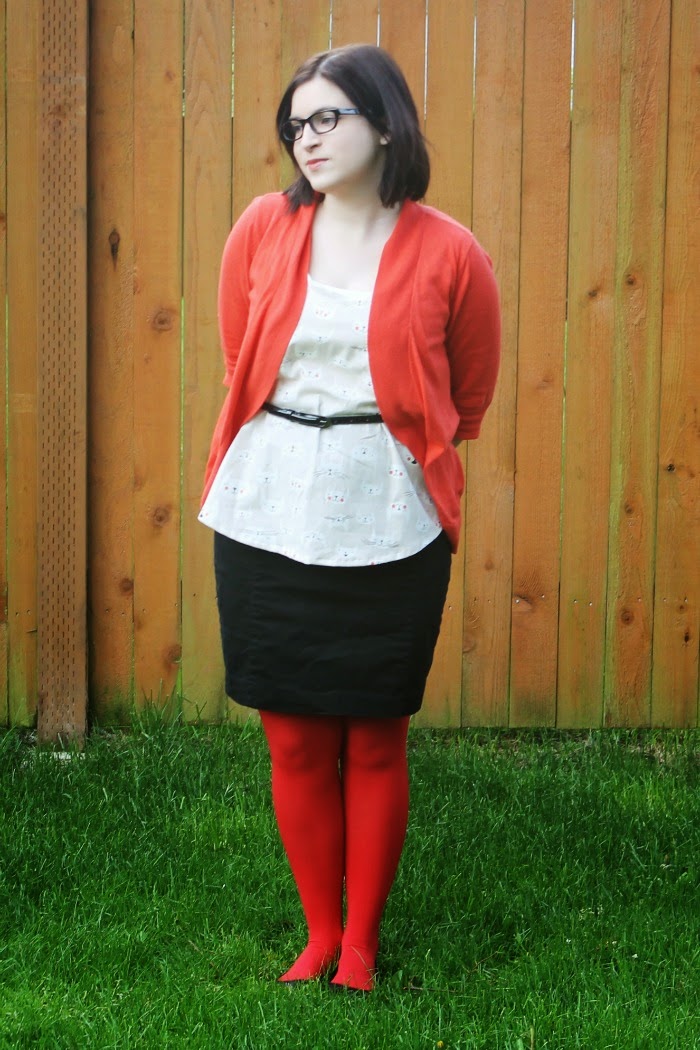
Surprise, surprise! I made another Wiksten Tank! (It’s my fifth one, if you must know.) This one is a little bit different. My crazy cat lady dress yielded some leftover yardage, so I decided to try out color blocking. There wasn’t quite enough of the Cattitude print for the front, so I just extended the coral Jewel print over the shoulders to compensate. The technique I used was made up on the spot: I connected a large strip of the coral Jewel print to the Cattitude print using a French seam, laid down the pattern piece on top of the joined fabric and moved it around until I liked how it looked. Then I proceeded to cut and sew the tank top as usual.


I knew I was on the right track when I tried on the half-finished garment and showed it to my three-year-old daughter. She jumped up and down, shrieked with glee and demanded her own kitty dress. I don’t know about you, but I call that success.


This shirt is one of my favorite handmade garments, because I made do with what I had on hand and ended up with something that I will actually wear and enjoy.


Monday, April 21, 2014

Easter Bunny Drawstring Bags


What do you do when you have small gifts to give to adults on Easter? Make a couple Easter Bunny Drawstring Bags, of course!


I’ve had a few fat quarters of this older Minny Muu print in my stash for ages. The brown one lent itself to pairing with some yellow Tone-on-Tone chevrons from Riley Blake and red hearts from Pam Kitty Love. I was quite pleased to be able to squeeze two of Jeni Baker’s Everything Bags with the same main fabric from one fat quarter. It was very close.


Monday, April 14, 2014

Spring Top Sewalong and Me-Made-May


I don’t know what it is about Spring that makes me want to sew garments, but it does. After a brief respite following my semi-failed Catnap Dress, I am once again excited about sewing my own clothes. It doesn’t hurt that there are currently two online events that I’d like to participate in: the Spring Top Sewalong, which encourages the making of garments and Me-Made-May, which encourages the wearing of handmade items. They dovetail nicely, as during the first event (April 14-May 11) I can make tops to wear for the duration of the second event (May 1-May 31). In fact, this weekend I started a Wiksten tank out of my Catnap leftovers. Yep, that’s Wiksten tank #5 for this girl. I really need to branch out, as reflected in my Me-Made-May pledge:


'I, Rachel of Snippets of Sweetness, sign up as a participant of Me-Made-May '14. I endeavor to wear one handmade garment each day for the duration of May 2014 and to make one garment in May 2014 out of a new-to-me pattern or fabric type.'


From my current stash of fabrics and patterns, I have two choices for my new-to-me garment: a modified Staple Dress shirt out of voile, or a Taffy Blouse out of quilting cotton. The voile shirt is the top candidate at the moment, as I suspect I will have better luck with new patterns in the future if I’m comfortable with a wider range of fabric types.


I will post my finishes here on the blog, but feel free to follow along with my progress on Instagram (@snippetsofsweetness) or Flickr (@snippetsofsweetness!).


me-made-may'14

Friday, April 11, 2014

January Jewels Revisited


The other day, a reader commented on my January Jewels post, asking about how I designed the quilt. Since she was a no-reply blogger, I couldn't answer her directly. Instead, I will share my process with all of you and hope she is still reading. 

Judi wrote: “Hi Rachel, I'm just admiring your trip around the world quilt! How did you offset it like that? Is it all in the way you position your blocks? What size strips did you use? Love the modern look on this. Beautiful!”

As previously mentioned, to make this baby quilt I used the tutorial from Quiltville and the size guide from Just a Bit Frayed. In short, I made nine blocks, consisting of six 2.5” by 16” strips. Most of the Scrappy Trip Along quilts I have seen are scrappy indeed and part of their charm lies in the serendipity of their fabric combinations. 


For this quilt, I wanted a more cohesive look. I made sure that each block contained one strip of dark blue, and that it was always the diagonal center of the block. (At least one block had to be unpicked and resewn at one point.)


After the blocks were pieced, I thought about placement. I wanted to arrange the blocks so that the blue lines formed a diamond. After sketching it out, it was clear that I only had enough blocks for an offset diamond, so that’s what I did.


Hope you have found this helpful! Thank you all for the lovely comments.